Schedule
The Scheduler can be used to run a HTTP request, as define by the HTTP Trigger, on a regular basis, scheduled by a Cron Expression.
General
In the general tab the Cron Expression and some other general settings are managed.

- Active
- If checked the scheduler is active and the HTTP Trigger is excecuted, with the frequency defined by the Cron Expression.
- Cron Description
- A short text describing the frequency of the Cron Expression.
- This text is currently only editable via Raw tab. It might be generated, based on the Cron Expression in the future.
- Cron
- The Cron Expression that is used to schedule the HTTP Trigger.
- Path
- Deprecated, not in use.
- Last Execution and Next Execution
- This is only for your information and cannot be changed.
- Last Execution shows when your Schedule was last triggered.
- Next Execution shows when your Schedule will next be triggered based on the Cron Expression in Cron.
- Cron Type
- There are multiple supported cron types:
UNIX: Linux crontab. If you're not sure which one to use, this is the most common option.QUARTZ: Quartz Scheduler.CRON4J: cron4j Scheduler.SPRING: Spring Framework Cron Scheduler.
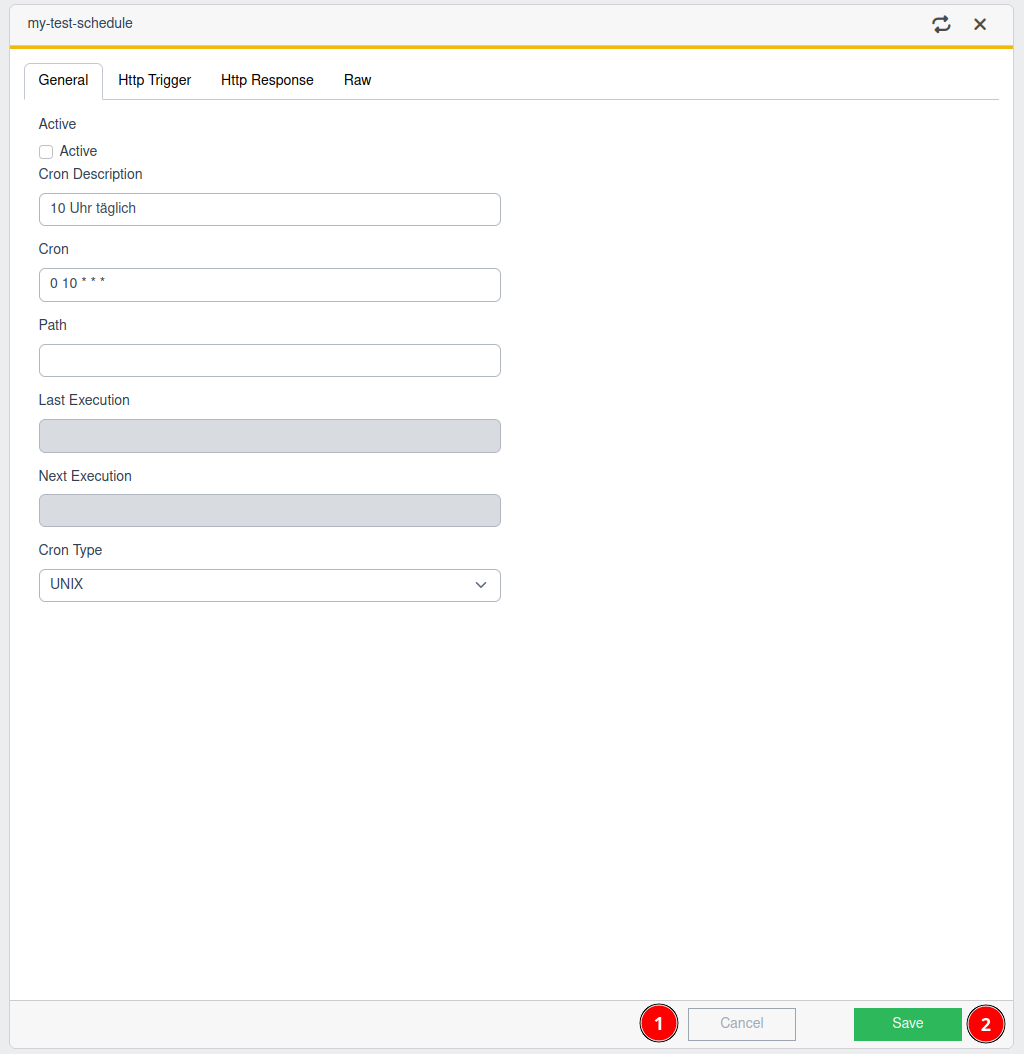
- Save your changes
- Discard your changes
HTTP Trigger
Define the HTTP request, which is triggered by the Cron defined in the general tab.
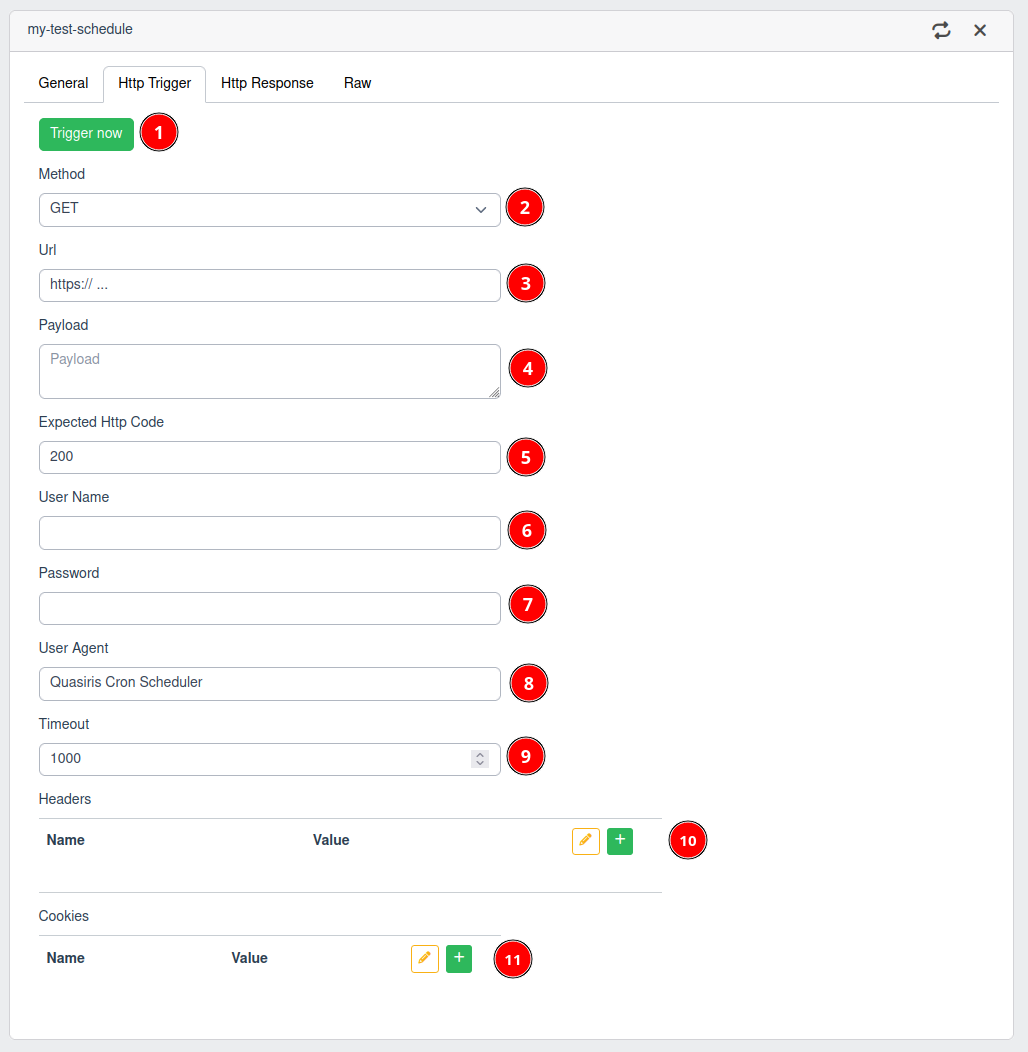
- Trigger now
- Run HTTP request with current configuration.
- HTTP Method
- URL
- URL to send the HTTP request to.
- Payload
- Payload of the HTTP request.
- Expected HTTP code
- Expected HTTP response code for a successful HTTP request.
- Username
- Username for basic auth.
- Password
- Password for basic auth.
- User Agent
- Specify a user agent to identify the HTTP request.
- Timeout
- [] TODO add unit of measurement
- Headers
- Define optional headers of the HTTP request.
- Cookies
- Define optional cookies of the HTTP request.
Headers and Cookies
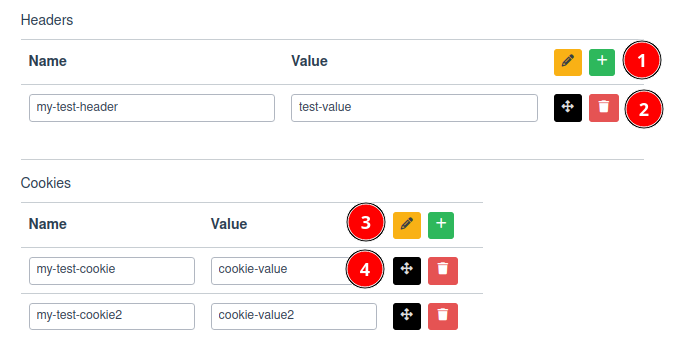
- Create new header or enter edit mode
- By clicking the green "+" you can add new headers.
- By clicking the orange "pen" you can enter and exit the edit mode to modify headers.
- Name and value of header
- Here you can specify the name and the value of the header.
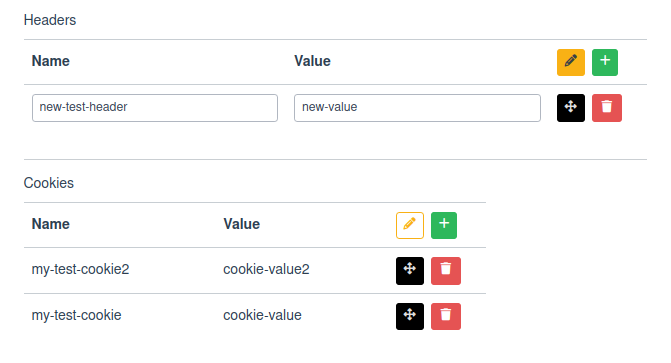
- You can delete the header by clicking the red "trashcan". After that the symbol changes to an orange "!". Click the orange "!" again to confirm the deletion.
- Click, hold and drag the black navigation cross to change the order of the headers.
- Create new cookie or enter edit mode
- By clicking the green "+" you can add new cookies.
- By clicking the orange "pen" you can enter and exit the edit mode to modify cookies.
- Name and Value of cookie
- Here you can specify the name and the value of the cookie.
- You can delete the cookie by clicking the red "trashcan". After that the symbol changes to an orange "!". Click the orange "!" again to confirm the deletion.
- Click, hold and drag the black navigation cross to change the order of the cookies.
HTTP Response
The responses of the previous requests are shown in the list below. You can show details by clicking on the arrow on the left of the desired response.
Cron Expression
UNIX Style Cron Expressions
https://en.wikipedia.org/wiki/Cron
# ┌───────────── minute (0 - 59)
# │ ┌───────────── hour (0 - 23)
# │ │ ┌───────────── day of the month (1 - 31)
# │ │ │ ┌───────────── month (1 - 12)
# │ │ │ │ ┌───────────── day of the week (0 - 6) (Sunday to Saturday;
# │ │ │ │ │                                   7 is also Sunday on some systems)
# │ │ │ │ │
# │ │ │ │ │
# * * * * *
Common Examples
| Cron Expression | description |
|---|---|
| * * * * * | every minute |
| 30 20 * * * | every day at 20:30 |
| 30 20 1 * * | once a month of the first day at 20:30 |
You can use this tool to evaluate your cron expression.