The Email section lets you create and manage email templates in QSC.
Overview
To get an overview of all email templates, navigate to Email.
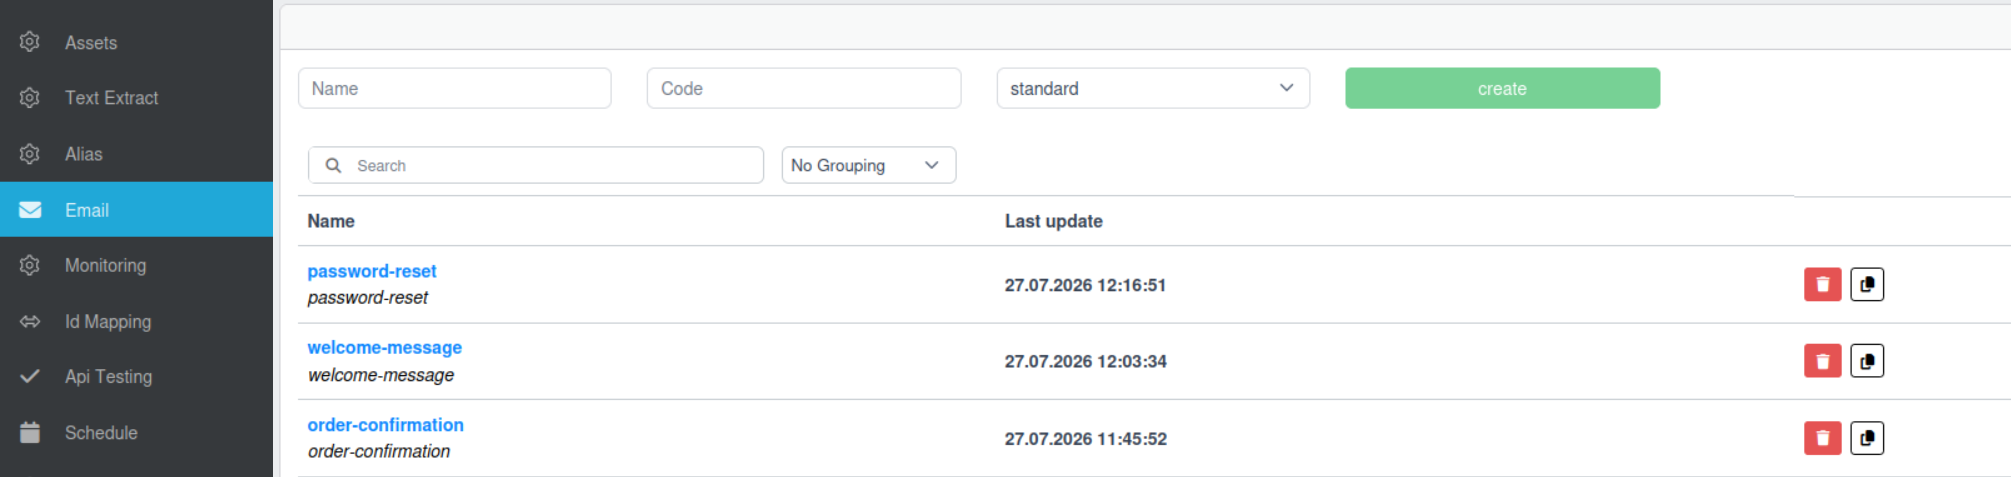
Create Email Template
To create a new email template:
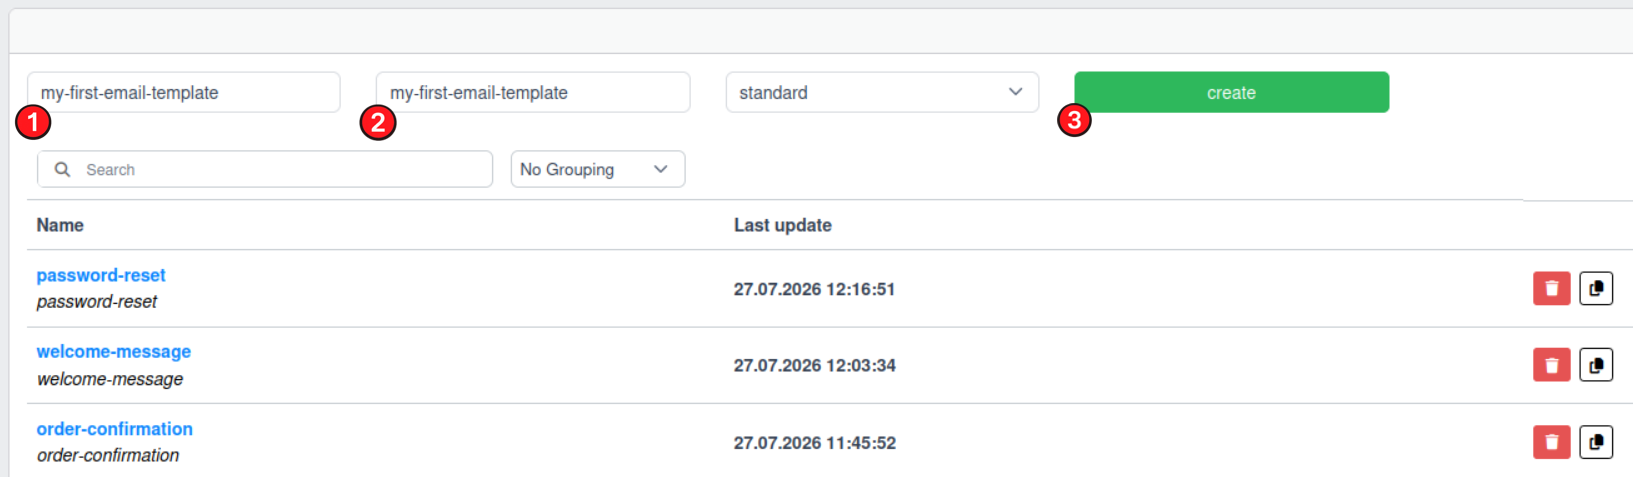
- 1.) Enter a name.
- 2.) Enter a code.
- 3.) Press the create button.
After creating an email template, you are redirected to the first configuration page.
General Configuration
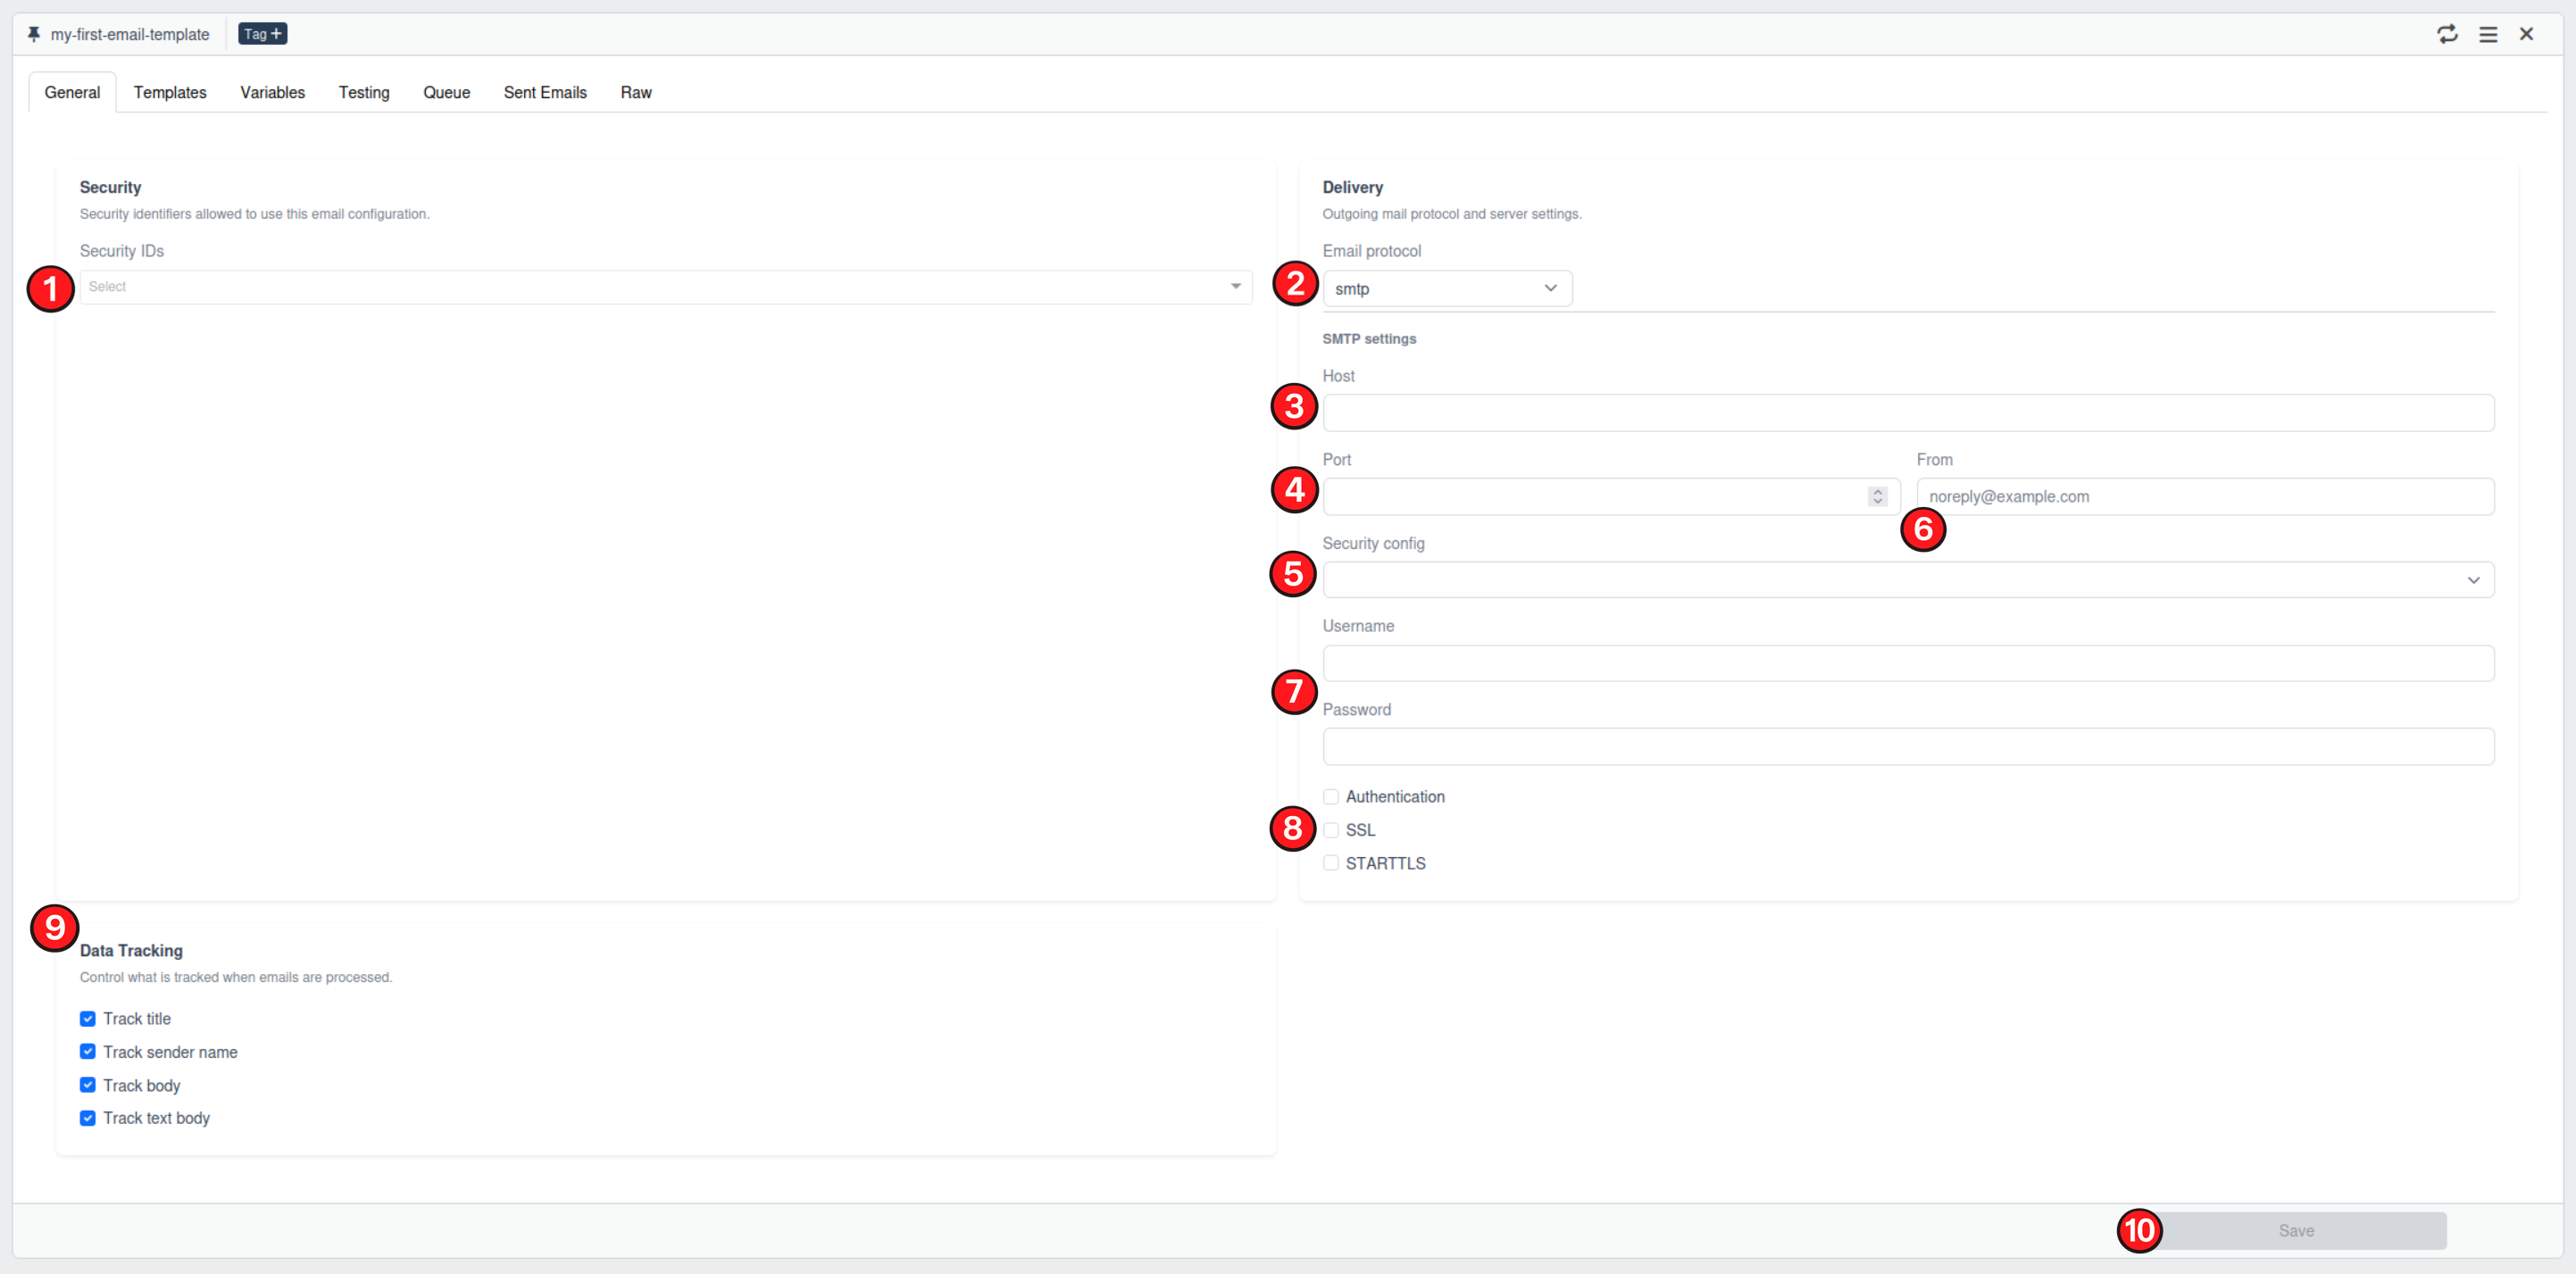
- 1.) Select the security IDs that are allowed to use this email configuration.
- 2.) The email protocol is
smtp. - 3.) Enter the host of the SMTP server.
- 4.) Enter the port used by the SMTP server.
- 5.) Optionally select a security configuration. If none is selected, use manual SMTP credentials.
- 6.) Enter the sender email address in the From field.
- 7.) If no security configuration is selected, enter the SMTP username and password.
- 8.) Enable the SMTP connection and authentication options required by your mail server: Authentication, SSL, and STARTTLS.
- 9.) Select which email data should be stored in the sending log: title, sender name, HTML body, and plain-text body. The data can be viewed in the Sent Emails tab.
- 10.) Press Save to save the email configuration.
Template Configuration
Use the Templates tab to configure the email subject, sender name, HTML body, and optional plain-text body. All
templates use either the mustache or freemarker engine and can use variables from the Variables tab.
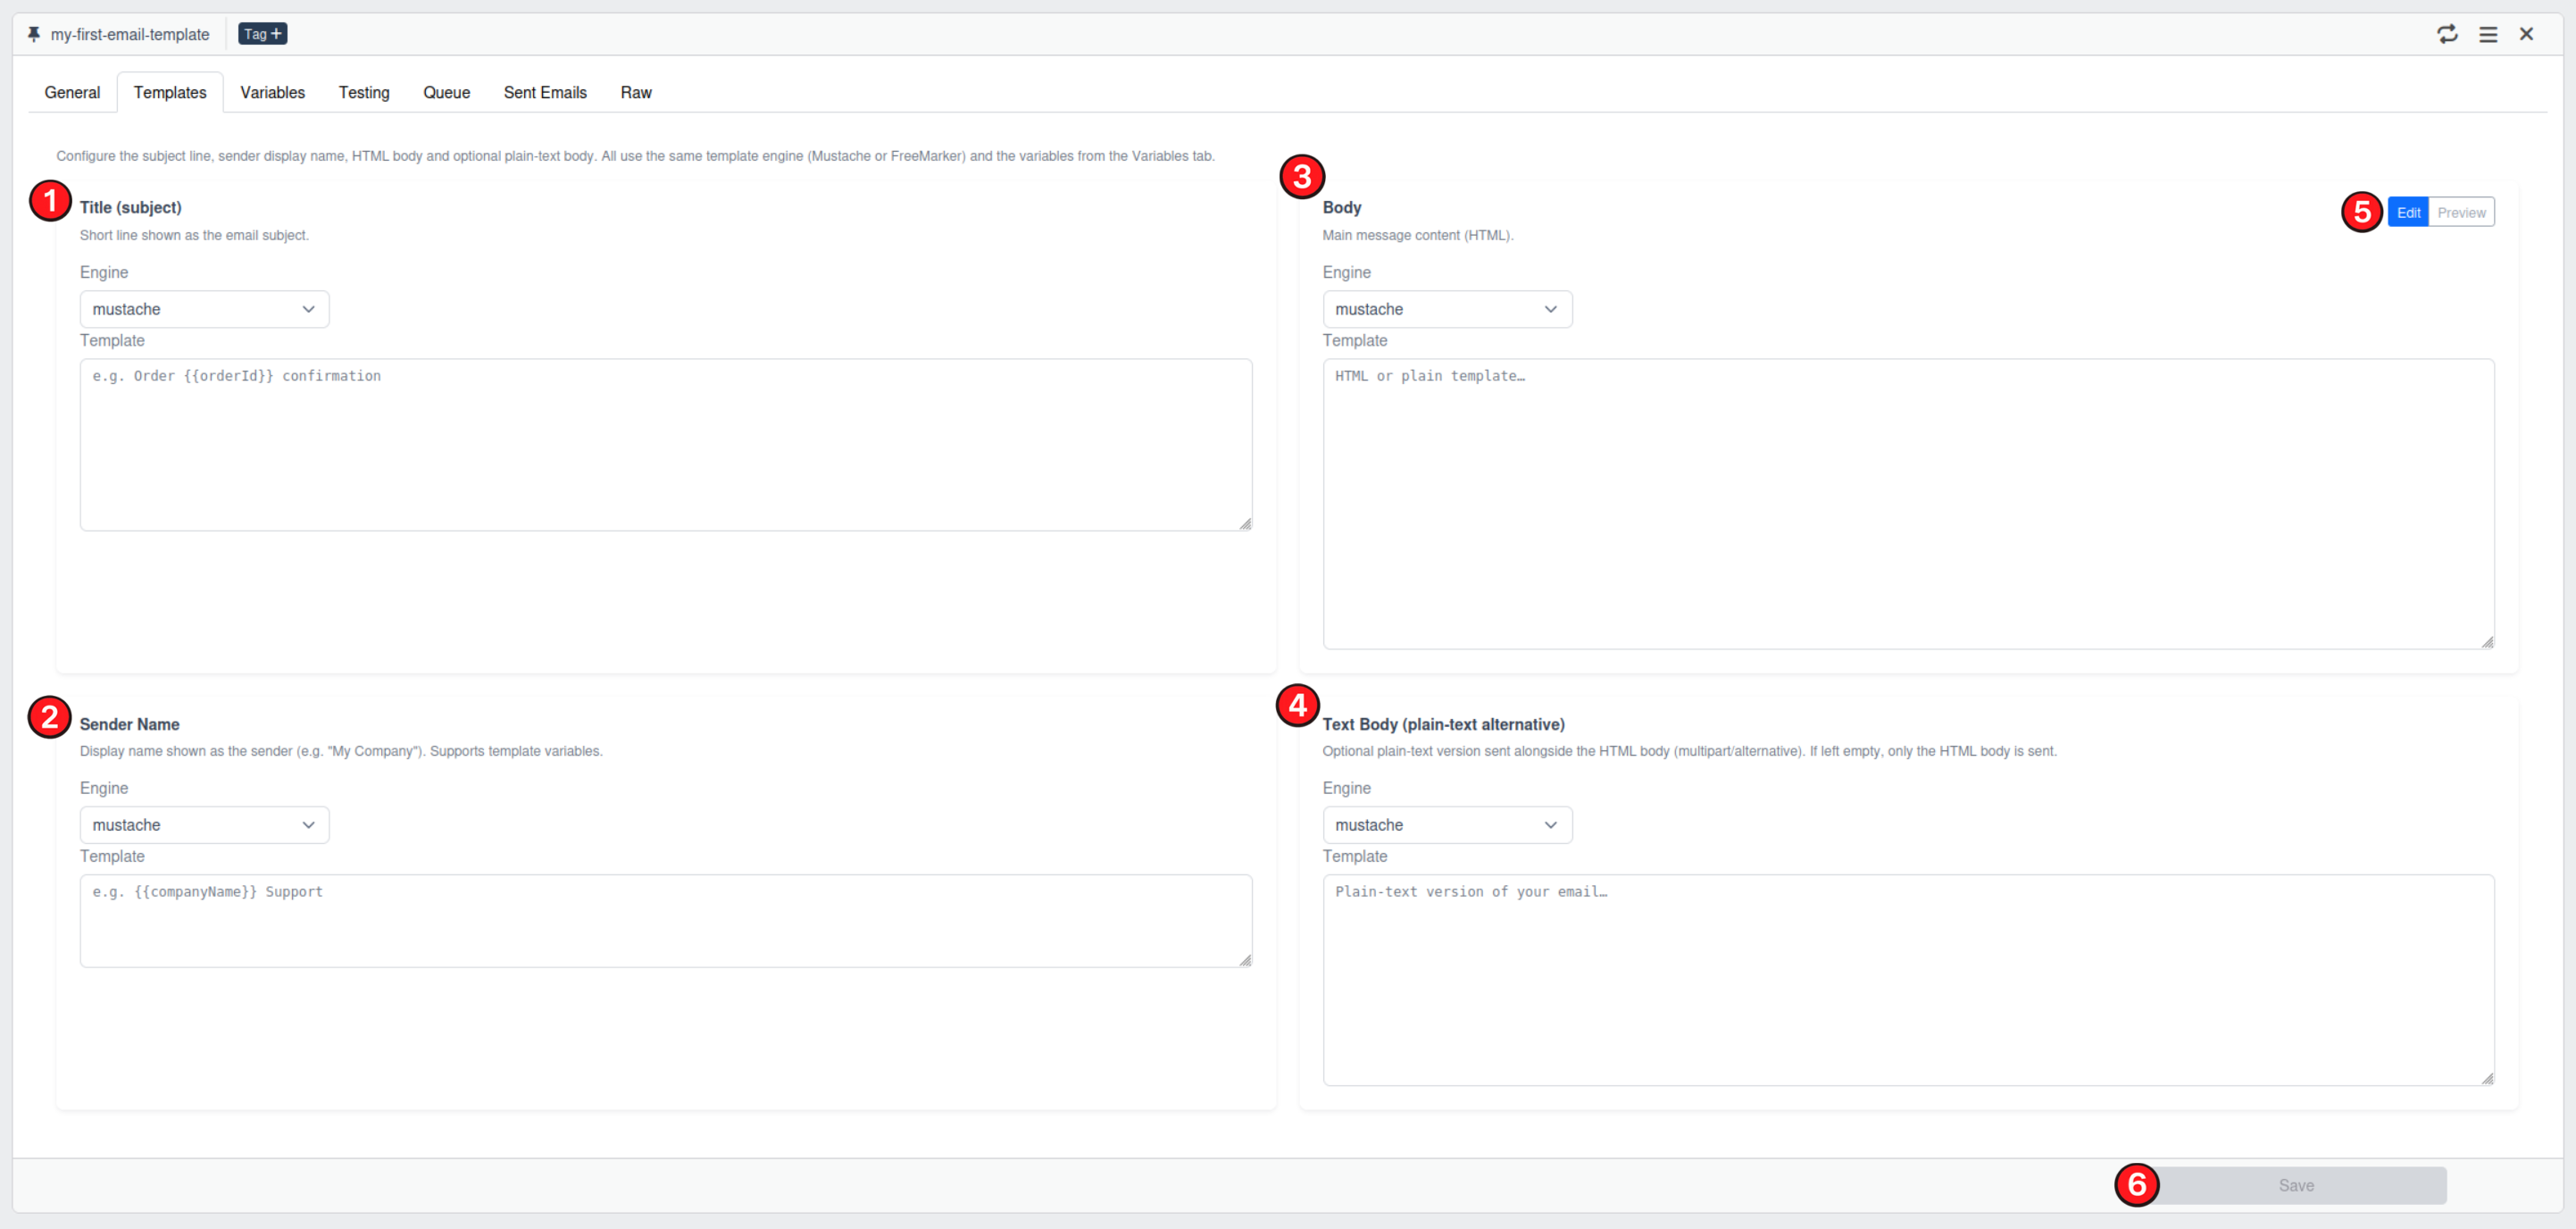
- 1.) Configure the Title (subject) shown as the email subject.
- 2.) Configure the Sender Name displayed as the email sender.
- 3.) Configure the HTML Body of the email.
- 4.) Optionally configure a plain-text alternative in Text Body. If it is left empty, only the HTML body is sent.
- 5.) Switch between Edit and Preview to edit or preview the HTML email body.
- 6.) Press Save to save the template configuration.
Variables Configuration
Use the Variables tab to configure variables that can be used in the email templates.

- 1.) The first row shows an existing variable.
- 2.) Select the variable type:
- Standard displays the value normally in the Variables tab.
- Masked displays the value as a password field in the Variables tab.
- 3.) Enter a default value. It can be temporarily overridden for an individual test email in the Testing tab.
- 4.) Press the delete button to remove the complete variable entry, including its name, type, and value. Press Save to apply the change permanently.
- 5.) To add a variable, enter its key and value, select the variable type, and press Add.
Testing
Use the Testing tab to send a test email based on the configured template.
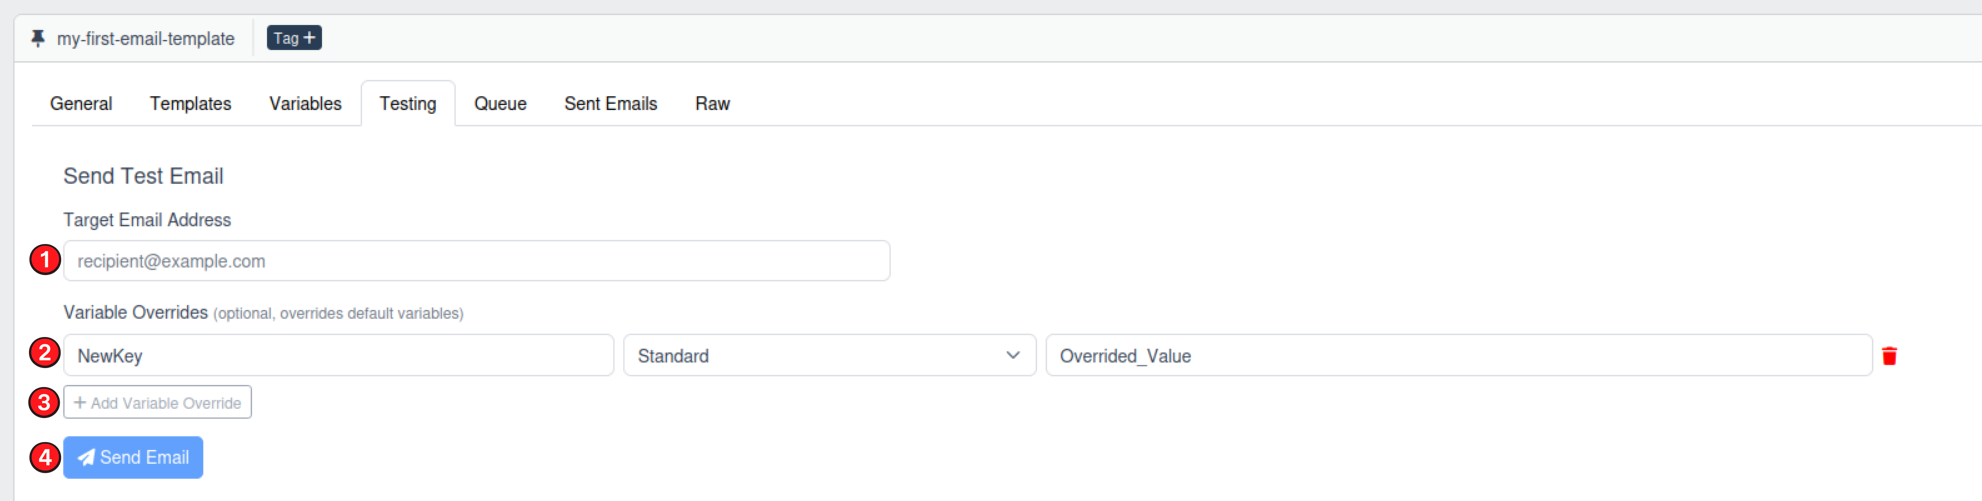
- 1.) Enter the recipient address in Target Email Address.
- 2.) Optionally set or override individual template variables for this test email, for example
NewKey = Overridden_Value. The configured default value is replaced only for this test. - 3.) Press Add Variable Override to add another variable override.
- 4.) Press Send Email to queue the test email for sending.
Changes made under Variable Overrides are not saved as permanent configuration.
Queue
The Queue tab shows emails that have not yet completed sending.
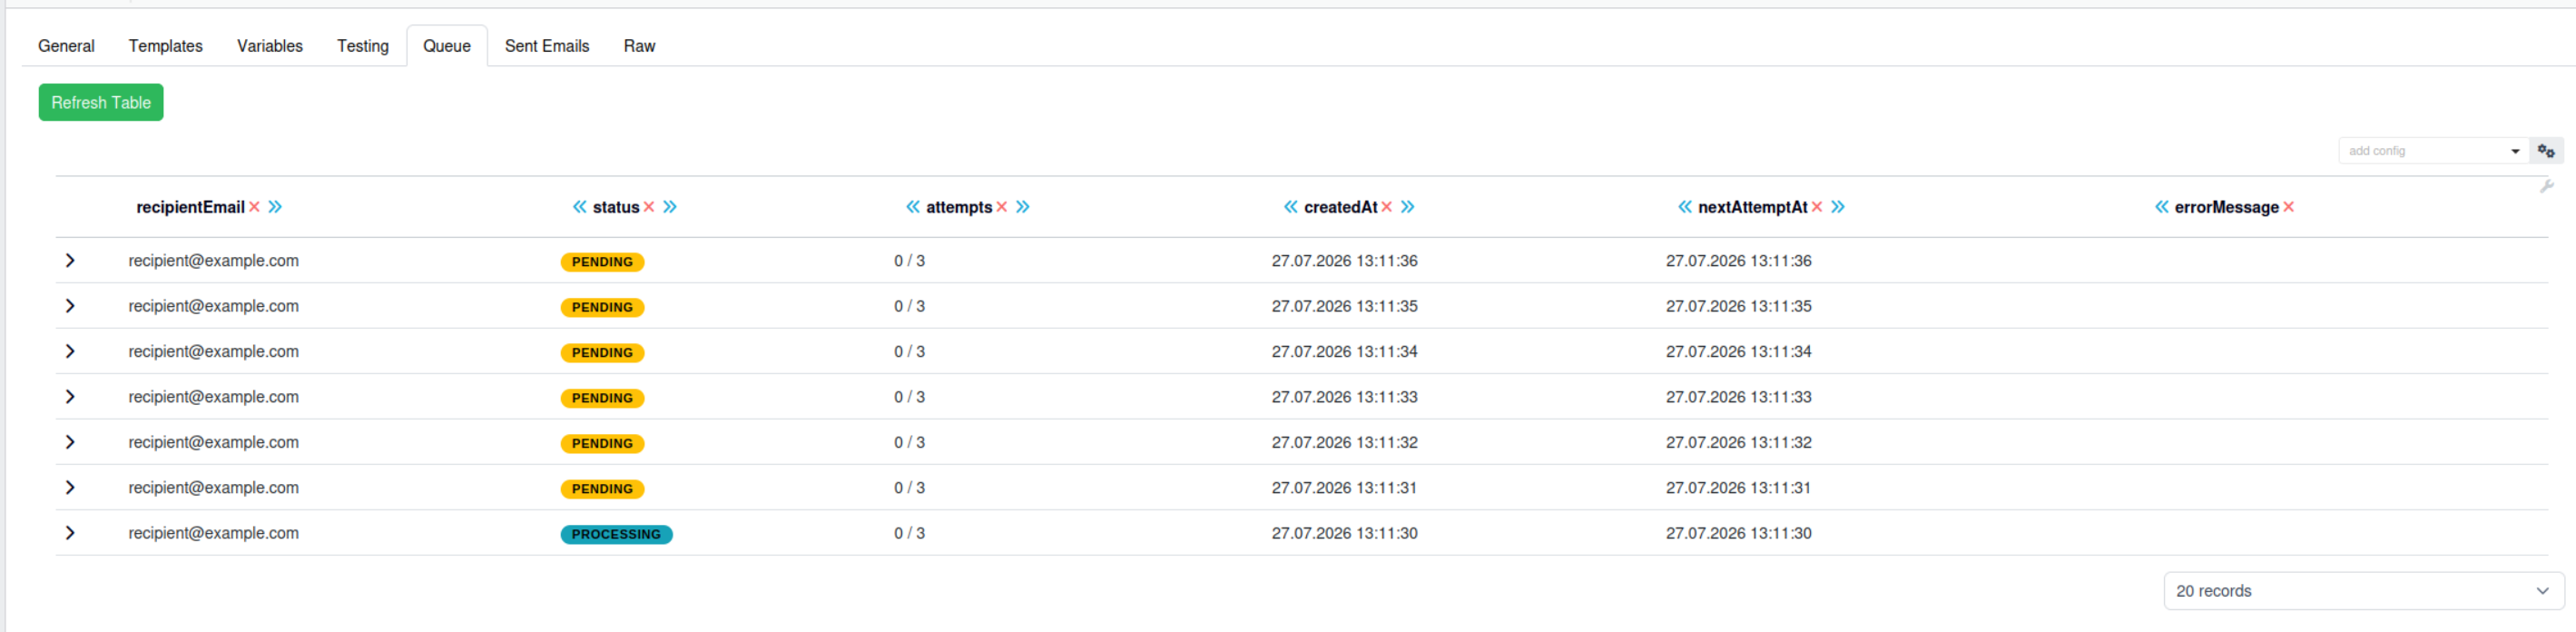
- PENDING: The email is waiting to be sent.
- PROCESSING: The email is currently being processed.
- attempts: Shows the number of completed attempts and the maximum number of sending attempts.
- createdAt / nextAttemptAt: Shows when the email was queued and when the next sending attempt is scheduled.
- errorMessage: Shows the error from the most recent sending attempt.
Press Refresh Table to load the current status. Once processing has finished, the email is listed in the Sent Emails tab.
Sent Emails
The Sent Emails tab lists completed email deliveries.

The table shows delivery metadata, such as recipient, status, and number of attempts, as well as the data captured according to the tracking options enabled in the General tab.
Press Refresh Table to update the list.
Integrate the Email Template
After creating and configuring an email template, integrate it into your application by calling the Email API. For the endpoint, authentication, and request format, see the Email API.